- Table View
- List View
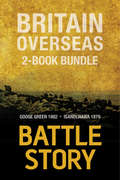
Battle Stories — Britain Overseas 2-Book Bundle: Goose Green 1982 / Isandlwana 1879
by Gregory Fremont-Barnes Edmund YorkeTwo pivotal moments in British military history, separated by more than a century, yet both with decisive impacts on Britain’s national identity and power overseas. At Isandlwana, South Africa, as at Goose Green in the Falkland Islands, British commanders underestimated local forces and found themselves unprepared for the full extent of combat on the ground. One engagement ended in disaster and a total rethinking of tactics. The other, thanks to hard lessons learned, ended in British victory. Two renowned experts tell the full stories of both battles, complete with detailed profiles of key figures and a moment-to-moment breakdown of history in the making. Isandlwana 1879 On January 22, 1879, a 20,000-strong Zulu army attacked 1,700 British and colonial forces. The engagement saw primitive weapons of spears and shields clashing with the latest military technology. However, despite being poorly equipped, the numerically superior Zulu force crushed the British troops, killing 1,300 men, while only losing 1,000 of their own warriors. It was a humiliating defeat for the British Army, which had been poorly trained and which had underestimated its enemy. The defeat ensured that the British had a renewed respect for their opponents and changed their tactics; rather than fighting in a straight, linear formation, known as the Thin Red Line, they adopted an entrenched system or close order formations. The defeat caused much consternation throughout the British Empire, which had assumed that the Zulu were no match for the British Army; thus, the army was greatly reinforced and went on to victory at Rorke’s Drift. Isandlwana 1879 puts you at the forefront of the action. Goose Green 1982 The Battle for Goose Green has become an integral part of the Falklands story, and yet it nearly didn’t take place at all. Originally earmarked to be isolated, Goose Green was eventually attacked due to the loss of momentum in the invasion force. The British 2 Para Regiment were deployed against the 12th Argentinean Regiment, which numbered about 1,200 men. The British believed that the Argentinean force numbered at least half this and set off with a strength of 690 men. They took two days’ rations, weapons, and ammunition in the belief that it would be a swift conquest. There followed a bitter and bloody fight as the Argentine forces fiercely defended Goose Green. Despite reconnaissance, the British were hampered by trench systems that they had been unaware of. It was the first major engagement of the Falklands War.
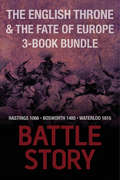
Battle Stories — The English Throne and the Fate of Europe 3-Book Bundle: Hastings 1066 / Bosworth 1485 / Waterloo 1815
by Gregory Fremont-Barnes Mike Ingram Jonathan TriggThree battles that shook the British Isles and changed the course of world history. Three renowned experts each take up one crucial day when the future of the throne, or Europe itself, hung in the balance. Hastings 1066 In 1066, a foreign invader won the throne of England in a single battle and changed not only the history of the British Isles, but that of Christendom, forever. Harold Godwinson’s army, exhausted from their victory against an invading Norwegian Viking army at the Battle of Stamford Bridge in the north, and his navy, scattered by storms, could not hold back William of Normandy. But would the invasion have succeeded if the two armies had met on equal terms? Bosworth 1485 Bosworth Field saw the two great dynasties of the day clash on the battlefield: the reigning House of York, led by Richard III, and the rising House of Tudor, led Henry Tudor, soon to become Henry VII. On August 22, 1485, this penultimate battle in the Wars of the Roses was fought with the might of the Yorkists ranged against Tudor’s small army. This book describes how these two great armies came to meet on the battlefield, and how the Tudor tactics eventually led to the downfall and death of King Richard III. Waterloo 1815 The might of the French Empire under the leadership of the Emperor Napoleon faced the Coalition army under Duke of Wellington and Gerhard von Blucher for one last time at Waterloo. The battle saw the culmination of a long campaign to destroy Napoleon’s forces and halt the growth of the French Empire. Both armies lost over 20,000 men on the battlefield that day, but it was the coalition that emerged victorious in the end. Wellington’s counter-attack threw the French troops into disarray, a resounding victory for the British Army that changed the course of European history.
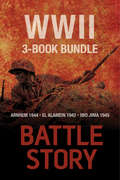
Battle Stories — The WWII 3-Book Bundle: El Alamein 1942 / Arnhem 1944 / Iwo Jima 1945
by Chris Brown Pier Paolo Battistelli Andrew RawsonThree battles that changed the course of WWII and echo through world history to the present day. Three renowned experts each take up one of these crucial engagements. Iwo Jima 1945 Operation Detachment, the invasion of Iwo Jima, on February 19, 1945, was the first campaign on Japanese soil, and it resulted in some of the fiercest fighting of the Pacific campaign. El Alamein 1942 El Alamein saw two of the greatest generals of the war pitted against each other: Rommel and Montgomery. Arnhem 1944 When we think of Arnhem, we think of a bridge too far and a sky full of parachutes dropping the Allies into the Netherlands. It was one of the most complex and strategically important operations of the war.
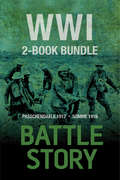
Battle Stories — WWI 2-Book Bundle: Somme 1916 / Passchendaele 1917
by Chris Mcnab Andrew RobertshawDiscover two pivotal battles of the First World War in this collection of Battle Stories. Somme 1916 The Battle of the Somme was one of the bloodiest fought in military history. It has come to signify for many the waste and bloodshed of the First World War, as hundreds of thousands of men on all sides lost their lives fighting over small gains in land. Yet this battle was also to mark a turning point in the war and to witness new methods of warfare. In this Battle Story, Andrew Robertshaw seeks to lift the battle out of its controversy and explain what really happened and why. Passchendaele 1917 Passchendaele is perhaps one of the most iconic campaigns of the First World War, coming to symbolize the mud and blood of the battlefield like no other. Fought for over three months under some of the worst conditions of the war, fighting became bogged down in a quagmire that made it almost impossible for any gains to be made.
Battle Story: Bannockburn 1314
by Chris BrownBannockburn 1314 is the most celebrated battle between Scotland and England, in which a mere 7,000 followers of Robert the Bruce defeated more than 15,000 of Edward II’s troops. The Battle of Bannockburn, fought over two days on 23 and 24 June 1314 by a small river crossing just south of Stirling, was a decisive victory for Robert, and secured for Scotland de facto independence from England. It was the greatest defeat the English would suffer throughout the Middle Ages, and a huge personal humiliation for Edward. Chris Brown’s account recreates the campaign from the perspectives of both the Scots and English. If you want to know what happened and why read – Battle Story.

Battle Story: Blenheim 1704
by James FalknerBlenheim has gone down in history as one of the turning points of the War of the Spanish Succession – and some would say in the history of conflict in Europe. The overwhelming Allied victory ensured the safety of Vienna from the Franco-Bavarian army, thus preventing the collapse of the Grand Alliance. Bavaria was knocked out of the war, and Louis's hopes for a quick victory came to an end. France suffered over 30,000 casualties including the commander-in-chief, Marshal Tallard, who was taken captive to England. Before the 1704 campaign ended, the Allies had taken towns on the Moselle in preparation for the following year's campaign into France itself. It was a brilliant victory for Marlborough, which involved a lightning march of over 250 miles and superb deception – even of his own Dutch allies! Blenheim must be one of the most well known battles – because of Blenheim Palace – but few know why.

Battle Story: Cambrai 1917
by Chris McNabCambrai 1917 was the battle that sowed the seeds of future combined-arms tank and infantry warfare, while remaining a battle of singular drama in its own right. If you truly want to understand what happened and why – read Battle Story. Detailed profiles explore the background of the generals of the two opposing forces, as well as what made up the average German and British soldier. First-person, contemporary sources bring the reader into the world of the Battle of Cambrai and show what it was like to be in the thick of battle. Detailed maps highlight key points in the battle and the surrounding area. Photographs place you on the front line of the unfolding action. Orders of battle reveal the composition of the two opposing forces’ army in detail. Packed with fact boxes, this short introduction is the perfect way to explore this important battle.
Battle Story: El Alamein 1942
by Pier Paolo BattistelliThe Second Battle of El Alamein marked a major turning point in the Western Desert Campaign of the Second World War. El Alamein saw tow of the greatest generals of the war pitted against each other: Rommel and Montgomery. Through key profiles and a chapter devoted to 'The Armies' Battle Story: El Alamein explores what made these men inspired leaders and what led to their respective defeat and victory. Montgomery's success ensured that the Axis army was unable to occupy Egypt and therefore gain control of the Suez Canal or the Middle Eastern oil fields, thereby preventing a major source of income and power for them. The background and impact of the battle are explored in separate chapters, so offering the reader a clear insight into why what happened in this remote part of Egypt was so central to the Allied cause. Through quotes and maps the text explore the unfolding action of the battle and puts the reader on the frontline. If you truly want to understand what happened and why - read Battle Story.
Battle Story: Goose Green 1982
by Gregory Fremont-BarnesThe Battle of Goose Green was the first and longest land conflict of the Falklands War, which was fought between British and Argentine forces in 1982. The British forces, attacking over featureless, wind-swept and boggy ground, were heavily outnumbered and lacked fire support, but brilliantly defeated the Argentine garrison in a fourteen-hour struggle. If you want to understand what happened and why – read Battle Story. Detailed profiles examine the personalities of the British and Argentine commanders, including that of Victoria Cross winner Lt Col ‘H’ Jones. First-hand accounts offer an insight into this remarkable fourteen-hour struggle against the odds. Detailed maps explore the area of Darwin Hill and Goose Green, and the advance of the British forces. Photographs place you at the centre of this pivotal battle. Orders of battle show the composition of the opposing forces’ armies. Packed with fact boxes, this short introduction is the perfect way to explore this crucial battle.
Battle Story: Hastings 1066
by Jonathan TriggIn 1066 the most significant battle on English soil – and arguably the most important in British history – took place some six miles northwest of Hastings. A king would die on the battlefield and a new dynasty would be established. The fighting exemplified the superiority of an all-arms combined attack employing foot soldiers, cavalry and archers against massed infantry. To understand what happened and why – read Battle Story. Photographs of the battlefield today, artist’s interpretations and of course reproductions from the Bayeux tapestry place you in the centre of the action. Easy-to-read maps plot each development in the struggle. Descriptions of the weaponry, armour and tactics of the combatants help explain why the famous housecarls of England were obliterated for all time. Packed with fact boxes, this short introduction is the perfect way to explore a turning point in British and European history.
Battle Story: Isandlwana 1879
by Edmund YorkeOn 22 January 1879 a 20,000-strong Zulu army attacked 1,700 British and colonial forces. The engagement saw primitive weapons of spears and shields clashing with the latest military technology. However, despite being poorly equipped, the numerically superior Zulu force crushed the British troops, killing 1,300 men, whilst only losing 1,000 of their own warriors. It was a humiliating defeat for the British Army, who had been poorly trained and who had underestimated their enemy. The defeat ensured that the British had a renewed respect for their opponents and changed their tactics, rather than fighting in a straight, linear formation, known as the Thin Red Line they adopted an entrenched system or close order foundations. The defeat caused much consternation throughout the British Empire, who had assumed that the Zulu were no match for the British Army and thus the army was greatly reinforced and went on to victory at Rorke's Drift. Battle Story: Isandlwana puts you at the forefront of the action.
Battle Story: Iwo Jima 1945 (Battle Story #1)
by Andrew RawsonOperation Detachment, the US invasion of Iwo Jima on 19 February 1945, was the first campaign on Japanese soil and resulted in some of the fiercest fighting in the Pacific. If you truly want to understand what happened and why – read this battle story.Detailed profiles explore the leaders, tactics and equipment of the US and Japanese armies. Nine specially commissioned maps track the progress of the battle and the shifting frontlines. Rare photographs place you in the centre of the unfolding action. Diary extracts and quotes give you a soldier’s eye-view of the battle. Orders of Battle reveal the composition of the opposing forces’ armies.Packed with fact boxes, this short introduction is the perfect way to explore this important battle.
Battle Story: Kabul 1841-42
by Edmund YorkeKabul is a name that has had much resonance in current affairs over the last few years, however its place in military history can be charted much further back to the first British incursions into Afghanistan during the 19th century. The First Anglo-Afghan War saw British India attempting to obtain power over Central Asia by gaining control of Afghanistan. The British had little understanding or appreciation of the terrain or tribal warfare in Afghanistan and incurred heavy casualties, despite being far superior in training and weaponry than the Afghan warriors they faced. In 1841 the British, having held Kabul for several years in an attempt to stop the Afghans colluding with the Russians, relaxed their grip on the garrison, allowing the Afghans to rebel, leading to the slaughter of over 16,000 British and Indian troops and camp followers. The outrage from the disaster resounded throughout the British Empire and reinforcements were sent to Afghanistan in 1842 to quell the Afghan troops. However, a rash of uprisings broke out around Kabul, leading to the murder of Indian sepoys and the imprisonment of British officers. In retribution an army was sent to support the British retreat from Afghanistan, laying waste to the city of Kabul on their way.
Battle Story: Kohima 1944 (Battle Story)
by Chris BrownKohima was the turning point in the Japanese invasion of India, witnessing the end of their attempt to overthrow the British Raj. It was a bitter battle fought in three stages, spanning three months and ending with the siege of Imphal. Losses on both sides were heavy, with the Japanese suffering their greatest land defeat thus far in the war. Against the odds and an enemy who nearly refused to give in, the British Army resisted the Japanese and their victory paved the way for the reconquest of Burma. Battle Story: Kohima explores the historical context of this critical point in the war in Asia, the personalities of the opposing armies and offers a blow-by-blow account of the battle.
Battle Story: Loos 1915
by Peter DoyleThe Battle of Loos saw a change in Allied strategy, which up until then had been a series of small-scale assaults that achieved little or no ground gained. Loos was to be different, Kitchener’s Army was deployed in strength for the first time and an ambitious plan aimed to take ground over a 20-mile front. As the fog of war descended the first day’s gains were lost over subsequent days’ fighting and in the end the ‘Big Push’ saw little achieved with Allied losses of about 50,000 men. Through quotes and maps the text explores the unfolding action of the battle and puts the reader on the frontline. If you truly want to understand what happened and why – read Battle Story.
Battle Story: Mafeking 1899-1900
by Edmund YorkeThe Siege of Mafeking remains one of the most renowned actions of the Second Boer War, with the British Army defeating a Boer force of up to 8,000 men with barely 1,500 troops. In a siege that lasted 217 days, Robert Baden-Powell and his troops withheld attack from the Boers against all the odds and Mafeking was finally relieved on 17 May 1900. It caused much public excitement in Victorian Britain, with Baden-Powell emerging as a national hero. If you want to understand what happened and why – read Battle Story. One of the most famous, if contoversial, battles of the Second Boer War – memorialised across South Africa, Canada and the United Kingdom The Siege of Mafeking was instrumental in turning Robert Baden-Powell (later founder of the Scouts) into a national hero Includes significant contribution from South African, Canadian and Australian troops
Battle Story: Maiwand 1880
by Edmund YorkeThe Battle of Maiwand was a key clash in the Second Anglo-Afghan War and one of the most serious defeats of the British Army during the ‘Great Game’. British and Indian troops, in an attempt to intercept Afghan forces at the Maiwand Pass, disastrously underestimated the strength of the enemy and were heavily defeated. If you want to understand what happened and why – read Battle Story. Detailed profiles explore the personalities of the British and Afghan leaders, Brigadier General George Burrows and Ayub Khan. Diary extracts and quotes detail the intense fighting and the causes of the British defeat. Maps examine the movements of the British and Afghan forces as they clashed at the Maiwand Pass. Contemporary images place the reader at the forefront of the unfolding action. Orders of battle show the composition of the opposing forces’ armies. Packed with fact boxes, this short introduction is the perfect way to explore this crucial battle.
Battle Story: Omdurman 1898
by William WrightThe battle took place at Kerreri, 11km north of Omdurman in the Sudan. Kitchener commanded a force of 8,000 British regulars and a mixed force of 17,000 Sudanese and Egyptian soldiers. He arrayed his force in an arc around the village of Egeiga close to the bank of the Nile, where a gunboat flotilla waited in support, facing a wide, flat plain with hills rising to the left and right. The British and Egyptian cavalry were placed on either flank. Al-Taashi's followers, known as Ansar and sometimes referred to as Dervishes, numbered around 50,000, including some 3,000 cavalry. In a few hours and at a loss of less than 400 officers and men killed and wounded, the Anglo-Egyptian army defeated the 50,000 brave tribesmen who charged their enemy, regardless of the hail of Maxim bullets, many of them armed only with spears, swords and ancient chainmail armour. In concise detail, with orders of battle, maps and over fifty images, the author shows how Omdurman was a superb example of tactics in warfare. First-hand accounts from both sides help the reader to understand all the horrors and glory of that day including the famous charge of the 21st Lancers, often called the last great cavalry charge of the British Army. This was arguably the height of British Empire military dominance.
Battle Story: Rorke's Drift 1879
by Edmund YorkeOn 22 January 1879 a 20,000-strong Zulu army decimated the British camp at Isandlwana. On the back of this victory 3,000–4,000 Zulu warriors swept towards the garrison of Rorke’s Drift, expecting to devastate the c.500-strong British and colonial force there. However, this small, but stalwart group of brave British soldiers withstood this overwhelming force over the next forty-eight hours and ultimately repelled them in a British victory that has been immortalised in books and film. Eleven Victoria Crosses were awarded for this extraordinary feat. To understand what happened and why – read Battle Story. Moving first-hand accounts reveal the brutal nature of the battle. Biographies of the commanders and soldiers involved explore the differing tactics and motivations of both sides. Paintings, illustrations and rare photographs place you at the centre of the action. Orders of battle detail the composition of the opposing forces’ armies. Packed with fact boxes, this short introduction is the perfect way to explore this legendary battle.
Battle Story: Singapore 1942 (Battle Story)
by Chris BrownThe fall of Singapore 1942 was one of the most decisive defeats of British and Commonwealth troops in the Second World War, driven primarily by Allied complacency. If you want to understand what happened and why – read Battle Story:Detailed profiles explore the military backgrounds of the Allied and Japanese leadersComprehensive maps bring you close to the action with informative details of tactical layout of Singapore IslandPhotographs allow you to get to know the faces, equipment and terrain behind the battlePrimary accounts of the misguided British perspective of the war in the Far East appear throughoutOrders of battle reveal the composition of the British, Commonwealth and Japanese armiesPacked with fact boxes, this short introduction is the perfect way to explore this crucial battle.
Battle Story: Tet Offensive 1968
by Andrew RawsonBy the end of January 1968 the American people thought their armed forces were winning in South Vietnam after three years of escalating conflict. Then the North Vietnamese Army and Viet Cong struck back, hitting military and political targets across the country. While the NVA and Viet Cong suffered a military defeat, they dealt a huge blow to US support for the war. If you want to understand what happened and why - read Battle Story. Detailed profiles examine the background of the opposing commanders, as well as the contrasting tactics and equipment of their fighting forces. Contemporary accounts reveal the true story of this pivotal battle and its consequences for the Vietnam War. Specially commissioned maps analyse the key developments during the battle. Excellent photographs place the reader at the centre of the fighting. Orders of battle show the composition of the opposing forces’ armies.
Battle Story: Tobruk 1941
by Pier Paolo BattistelliThe siege of Tobruk lasted 240 days during which the ‘gallant garrison’ of Allied soldiers, including the famous ‘Desert Rats’ held out against constant attacks from Rommel’s Afrika Korps. The battle became one of the longest sieges in British military history and a potent symbol of British resistance. To understand what happened and why – read Battle Story. Diary extracts and quotes offer a real insight into what it was like for the Allied soldiers to live under siege. Maps highlight the adversities of the terrain and the strategic importance of the Tobruk fortress. Rare photographs place you on the frontline of the unfolding action. Orders of battle reveal the composition of the opposing forces’ armies. Packed with fact boxes, this short introduction is the perfect way to explore this important battle.

Battle Story: Verdun 1916
by Chris McNabThe Battle of Verdun was one of the bloodiest engagements of the First World War, resulting in 698,000 deaths, 70,000 for each of the 10 months of battle. The French Army in the area were decimated and it is often most tragically remembered as the battle in which the French were ‘bled white’. A potent symbol of French resistance, the fortress town of Verdun was one that the French Army was loath to relinquish easily. It was partly for this reason that the German commander chose to launch a major offensive here, where he could dent French national pride and military morale. His attack commenced on 21 February, using shock troops and flamethrowers to clear the French trenches. Starting with the capture of Fort Douamont, by June 1916 the Germans were pressing on the city itself, exhausting their reserves. The French continued to fight valiantly, despite heavy losses and eventually rolled back German forces from the city. In the end it was a battle that saw much loss of life for little gain on either side.
Battle Story: Ypres 1914-1915
by Will FowlerYpres was a medieval town known for its textiles; however, it became infamous during the Great War with trench warfare, poison gas and many thousands of casualties. As the German Army advanced through Belgium, it failed to take the Ypres Salient. On 13 October 1914, German troops entered Ypres. On looting the city, the Germans retreated as the British Expeditionary Force advanced. On 22 November 1914, the Germans commenced a huge artillery barrage killing many civilians. In 1917, the Third Battle of Ypres commenced making it an exceptionally dangerous place to live. In 1918, a German major offensive was launched, but the British held firm. Ypres was finally safe in late September 1918 when German troops withdrew from the Salient. Today the battlefields of Ypres contain the resting place of thousands of German and British soldiers. This book explores the first and second battles of Ypres through narrative, eye-witness accounts and images.
Battle Surface!
by Stephen L. MooreCmdr. Lawson Paterson Red Ramage was among an elite group of just seven U.S. submariners who were awarded the Medal of Honor during World War II and the first not to die in the course of his heroic exploits. He was honored for his actions in the Pacific on the night of 31 July 1944 when he kept his submarine, USS Parche, on the surface and defiantly charged into the midst of a large Japanese convoy. Ramage's close-in, furious surface rampage became the talk of the submarine force, both in terms of its boldness and its destruction of the enemy shipping. Remarkably, Parche's crew had managed to reload their torpedo tubes while their skipper twisted and turned the boat through the chaos of machine gun bullets, exploding heavy shells, and Japanese ships trying to ram them.To tell Parche's dramatic story, author Stephen Moore draws on recently discovered wartime diaries and interviews with dozens of veterans, who add rich details to the official record. Readers learn what it was like on patrol in the Pacific to endure the terrors of torpedo attacks and depth charges, as well as learn how they relieved the stress of combat on liberty. The only book to focus exclusively on Parche and the incredible Red Ramage, it offers a rare, up-close look at the actions of the legendary World War II submarine, whose conning tower and periscopes are on permanent display in Pearl Harbor.